
DIY & Crafts
Kids' craft: How to make a family tree

Photograpy by Ryan Brook/TC Media Image by: Photograpy by Ryan Brook/TC Media
DIY & Crafts
Kids' craft: How to make a family tree
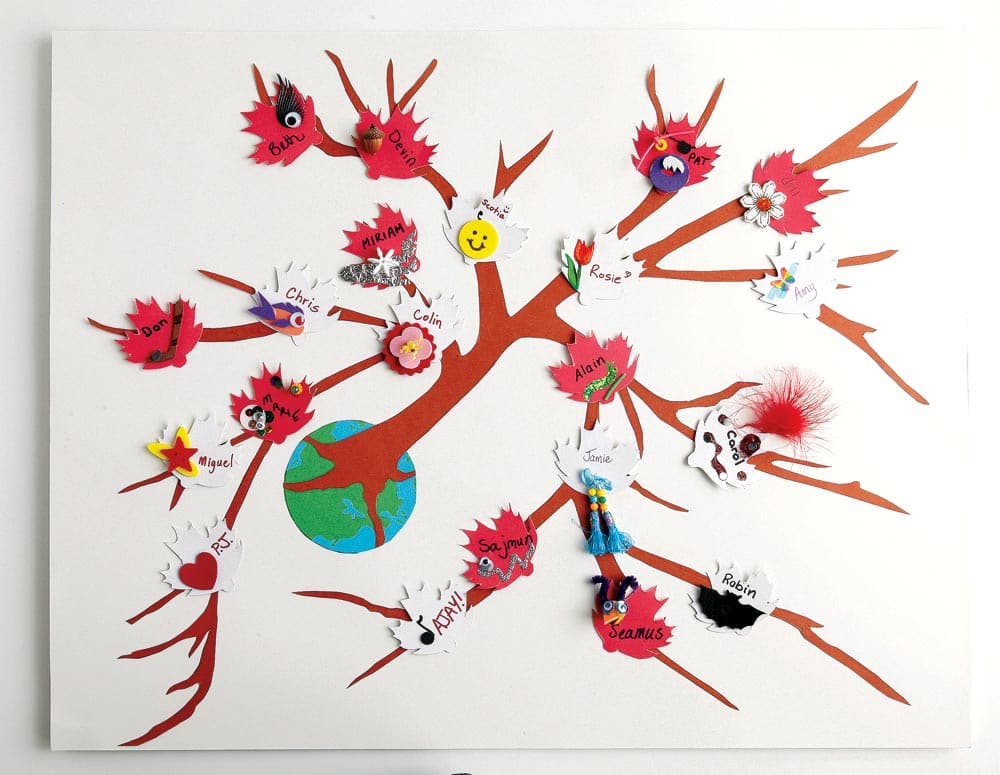
Add to the fun at your
family reunion by setting up a craft table where kids (of all ages!) can contribute to this funky
family tree.
With a project like this, a little bit of preparation goes a long way. Older kids can help by creating the tree trunk and leaf templates ahead of time; younger kids will love to help you gather the craft supplies and set up the table.
When the party starts, everyone will have a ball decorating his or her own leaf and adding it to the tree. When the party's over, send guests home with their leaves as souvenirs – or keep the tree intact and frame it as a memento of a great day.
You need:
• Bristol board (one sheet each white, brown and red)
• Acrylic paint or poster paint (green and blue)
• Foam core or bristol board (white)
• Maple leaf template
• Heavy cardboard or quilter's template plastic (optional)
• Assorted decorations, such as feathers, glitter, sequins, craft foam and buttons
• Pencil
• Scissors
• Painter's tape
• Glue stick and craft glue
• Pens and fine-point markers
Take a look at a larger photo of the finished family tree.
To make:
1. Draw Earth onto white bristol board. Paint green and blue; let dry. Cut out and glue Earth to foam core.
2. Sketch tree branches and roots onto brown bristol board. Cut out.
3. Place tree on foam core with roots overlapping Earth. Glue tree to foam core, starting at centre and working outward.
4. With pencil, trace leaf template onto red or white bristol board; cut out.
5. With marker, print name on leaf; glue on decorations as desired. Tape or glue leaves to tree.
Tip:
If you'll be tracing lots of leaves, consider creating durable template tracers. Trace the printed leaf template onto heavy cardboard or quilter's template plastic; cut out.
Note: We think the best part of this craft is personalizing the maple leaves. Break out the fancy pens and markers, and raid your craft cupboard, sewing basket, button jar and recycling bin for materials. Don't have room to display the tree board at your event? These leaves would also make great name tags – just supply safety pins.
This story was originally titled "Branching Out" in the July 2011 issue. Subscribe to Canadian Living today and never miss an issue!
Comments