
DIY & Crafts
Santa ornament

DIY & Crafts
Santa ornament
This Santa ornament will lend a crafty touch to your holiday decor.
Supplies:
• Scraps of felt: red, green, white and desired skin tone*
• Scraps of lightweight paper-backed fusible web
• Embroidery floss: green, white and black*
• .40 m (15-3/4 in) jute, fine cord or narrow ribbon*
• Actual size pattern (Click here to download)
*Available at craft supply stores.
Instructions:
1. Print out pattern; lay fusible web, backing side up, on pattern pieces; trace 1 of each along cutting lines. Cut out just outside cutting lines. Onto green felt, fuse square. Onto red felt, fuse hood and coat. Onto white felt, fuse hair/beard, moustache and pom-pom. Onto skin-tone felt, fuse face. Cut out each along cutting lines. Onto red felt, trace around green square; cut out red square and set aside. Peel off all backing.
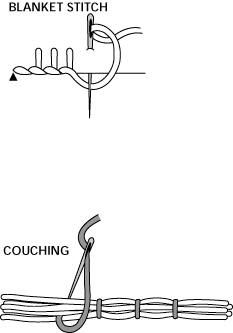
2. Using placement lines as guide, fuse moustache to face; using 2 strands
of green floss, blanket-stitch around moustache. Using 2 strands of black floss, stitch French knot for each eye as shown by blue dots. Using 2 strands of white floss, straight-stitch eyebrows as shown by green lines. Fuse face to hair/beard; blanket-stitch around cheeks and forehead.
3. Using placement lines as guide and 2 strands of green floss to stitch each: Fuse hair/beard to right side of green square; blanket-stitch around edge. Repeat with pom-pom. Fuse hood and coat in place; blanket-stitch around outer edges.
4. Using 2 strands of white floss, French-knot snowflakes on square as shown by blue dots.
5. With edges even, fuse green square to red square; using 2 strands of green floss, blanket-stitch around edge.
6. Cut jute into 2 equal lengths. Tie 1 in bow; stitch to 1 top corner of ornament front. Stitch 1 end of remaining length to each top corner of ornament back to make hanging loop.
Comments